Showing posts with label scintillating mandalas. Show all posts

Monday, 21 August 2017

Cute goodie bags.

Hello,

Have you checked the fabulous burlap ribbons released this month? The colors are gorgeous and lamination on the back makes its more durable.

Make your gifting more special with these cute tote bags. I have used my favorite paper stack - 'Scintillating Mandalas'. Since the ribbons are laminated I could die cut them for the decorative borders.


These bags are around 4" tall and 3.5" wide. So you can use them to gift small goodies or chocolates. With festivities around the corner, make your gifting special.

Hope you liked my creation. Till next time - Happy Crafting!!


Gayatri

 You can purchase all the Nakshathra Designz products at CraftsNeed.com

Saturday, 29 July 2017

DT post Gayatri - Mini scrap book album


Hello friends,

Today I am showcasing the 'Scintillating Mandalas' paper pack. I have made a scrap book album with 6 shaker pocket pages. This is an inspiration of the tutorial posted by Alexandra Morein. This album has a moving spine which is quite interesting. Here are few pictures of the album and a video of the album.


Here is a video of the album


Hope you liked my project. Till next time - Happy Crafting!

Thursday, 15 June 2017

Pop up card-GDT post by Riddhi Jani

Hello fellow crafters

Here I come with another project...

This paper collection is my favourite from Nakshathra designz.I used "Dazzling queens " and Scintillating Mandalas pattern paper pack.

Super gorgeous papers.

I made this card for my best friend...
She is as gorgeous as this papers.
I tried this combination for the first time..and I'm really happy with outcome of this colours...


Here it's a inner view of card ..and I made pop up card...


Hope you guys like it
Thanks
Riddhi

You can buy all Nakshathra Designz products from:
www.craftsneed.com

Sunday, 11 June 2017

Accodion card box-GDT post by Riddhi Jani

Hello guys,

Riddhi here
And I have made my project for my GDT post.
So here it is
I made an accordion card box .
I have used amazing paper collection Scintillating Mandalas from nakshtra designz...
Vibrant colours and beautiful designs..


Hope you all like it...please watch video for detail view 
😊

Buy all Nakshathra designz papers from:
www.craftsneed.com

Wednesday, 19 April 2017

Flag Album-Guest DT post by Karthikha Uday

Hello Crafty Folks!

I'm glad to be guest designing once more at Nakshathra Designz today! This time, I have tried my hands on a different kind of album for the first time - Flag Album :) And that too with the gorgeous Mandala paper pack! I'm just totally in love with this pack! Check out how awesome these papers are in this album!

Front of the album


Back of the album - keeping it plain

Side view

I'm in love with shaker elements these days! Made a shaker with diecuts from Gina Marie scallop stitched circles and sequins in blue and silver shades. Flowers are from Itsy Bitsy and the butterfly is a diecut from Sizzix Winged Beauties.


Memories stamp is from Craftyscrappers and heat embossed in gold. I've mounted the sentiment onto a diecut from Gina Marie scallop stitched rectangles, using foam tape. Added pearls for more interest.

This is how it looks on opening!

Isn't this lotus gorgeous!! I love how it suits perfectly for the sides of the album! 


I've kept the embellishments to the minimum inside the album, as I didn't want to cover the beautiful papers :) Also, once pics are added, matching elements can be added later.

A few more glitter butterflies


It's always good to see any creation in real, than photos right? Here it is!! :)


Hope you like my album! Do let me know your feedback!
Have a nice day :)

You can buy Nakshathra Designz papers from:
www.craftsneed.com

Wednesday, 29 March 2017

Name board-Guest Dt post by Blessy priya

Good Day!
I'm on Nakshthra Desingz blog today with a branded work :P Name board of my craft brand. I'm usually love Indian theme papers, and this Scintillating Mandalas paper pack is driving me crazy. Every time I sit for making any project I end up choosing this pack. Even a simple usage of this pack gives the project a mesmerizing look.

About the project, I took a cardboard for the base and covered it with black cardstock. Then stuck a paper from the pack cut in the shape of the base. For the name, I stenciled the alphabets on the cardboard, cut them out and applied 3D outliner for that glitter. Stuck the alphabets in place, added few flowers and metal charm.


Hope you liked it.
Regards,
Priya

All Nakshathra Designz are available at 

Did you Check out our Dazzling March Release Dazzling Queen if not check here:
https://www.facebook.com/nakshathradesignz/photos/rpp.263465544052019/374323722966200/?type=3&theater

Friday, 24 March 2017

Customized Clock-Guest DT post by Blessy Priya

Good Day!!

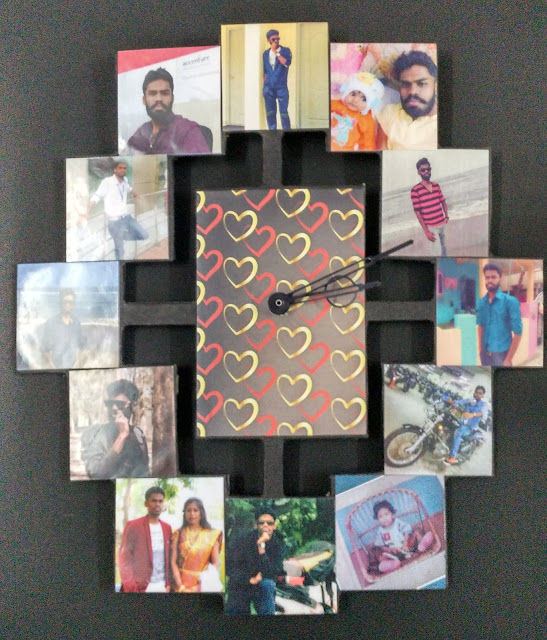
Time has  wonderful way of showing us what really matters. Customized clocks has always been a great gift option. So yes, its customized clocks for today’s guest dt post using Amor de oro pack and Scintillating mandalas.

Sharing few pics of the two customized clock that I made.


All Nakshathra Designz are available at 

Did you Check out our Dazzling March Release Dazzling Queen if not check here:
https://www.facebook.com/nakshathradesignz/photos/rpp.263465544052019/374323722966200/?type=3&theater

Regards,

Priya

Monday, 27 February 2017

Pop-up card with tutorial-- DT Post by Kriti Mishra


Namaste friends!!

Today I would like to share a pop up card with a tutorial. I have used Scintillating Mandalas paper pack from my DT kit and sentiment is from the Chalkboard Wonders. So, here is the card.


 It opens up like this


Now. enjoy the tutorial.

Tutorial

1. Take three pieces of cardstock, of sizes 20 cm x 10 cm, 26 cm X 9 cm and 30 cm x10 cm.


2. Take a first piece of card stock measuring 20 cm X 9 cm  and score this length ways at 4.5 cm.
    Make a pencil mark at 5.5 cm on all 4 sides. Score a cross joining these points.
    Then fold to form this mountain like shape.


3. Take another piece of card that measures 26 cm x 9 cm and score at 6.5 cm, 13 cm and 19.5 cm, this is the middle of your card and should look like a 'W' when folded.


4. Take another piece of cardstock measures 30 cm x 10 cm, score at 15 cm down the centre. 


5. Apply glue to one side of the pointed ends, find the centre of the outer card and line the point up just under the crease and stick down, now apply glue to the other side of the pointed end and close the card to adhere it to the outer card.


6. Now take the 'W' shaped card, find the centre of the mechanism, and place it. Now, put glue at two place as shown in pic and adhere the 'W' shaped card.


And voila!!...your card is ready to surprise someone...
I hope you like this project.

You can find these lovely papers at

Keep crafting!!
Kriti