Hello everyone..!!!
For those to whom this name is new, let me give a brief
introduction about myself.
I’m a crafter/IT professional based in Bangalore. My little
venture ‘Colours in Chaos’ is where I have been showcasing my artworks. My
curiosity to try new techniques has gotten me to work into mixed media, card
making, altered art and scrapbooking. You can have a look into my works on my
blog/FB page/Instagram.
Blog:
coloursinchaos.wordpress.com/blog/
Facebook Page:
facebook.com/pyehandicrafts
Instagram:
instagram.com/p_y_e/
This is my first Guest Designer post at Nakshathra Designz and I’m pretty excited to show you what I have
created.
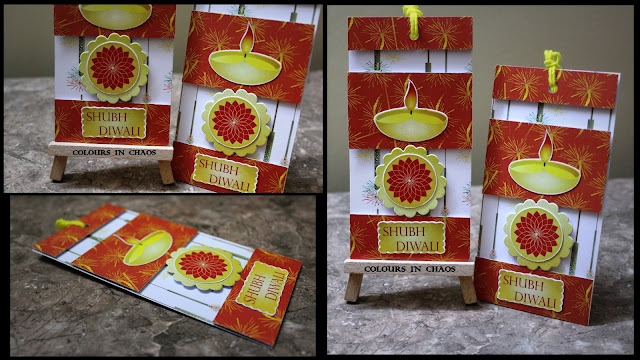
We have the festival of lights, Deepavali coming up this month end. Many of us include our friends
and family in the celebration by wishing them and giving sweets/little gifts. I
would like to share some handmade tags, which you can easily make for this
Deepavali and send it across to your loved ones.
For this project, I have used the lovely pattern papers “Sparkling Diwali”. This set comes with
24 papers of 11 designs (i.e. 2 papers of each design) + 2 sheets of die cut
designs. I have used the 6” x 6” inches set.
To make maximum utilization of the set, I have taken one 6”
x 6” pattern paper and cut it into 2 halves, measuring 6” x 3” inches. By doing
so, I can make 2 tags with same design.
Here is the first tag I made using 2 of the pattern papers:
This is a very much economical project. You can create around
20 tags from just 1 paper stack set (I’m excluding the die cut design sheets
and the one with diyas). However, for today, I will show 8 tags I made using 8
design papers. You can follow similar process for creating remaining tags.
Here goes the second set of tags.
For each tag, I’m grouping the cards into 2 designs, where I
use 1 design for the background and another for the foreground. With this
arrangement, you can create a window with the foreground paper to ensure the
background design is a seen-through.
Here’s the third one which I simply love, mainly because of
the color mix:
Once you have the layout ready, embellish it with festive elements
to make the card look interesting. To finish off, add a twine to the tag.
And now the final set of tags:
I had lot of fun creating these tags. I hope you also liked
this project and will try them out.
Last, but not the least; I would like to thank Akshma for
giving this opportunity to share my creations with you all at Nakshathra Designz.
*** Happy Crafting ***
You can shop these papers from


Hi yeshwashini.your work is awesome and explanation is crisp and clear
ReplyDeletethank u so much Rekha :)
ReplyDeleteBeautiful way to use these gorgeous papers, so pretty work Yeshaswini!
ReplyDeletethank u Vinita :)
DeleteSuch pretty tags! Love how you used both the positives and negatives of the die cuts 😊
ReplyDeletethanks Karthikha... :) there is so much that can be done using the negatives of a die cut... glad I could show it through these tags...!!!
Delete