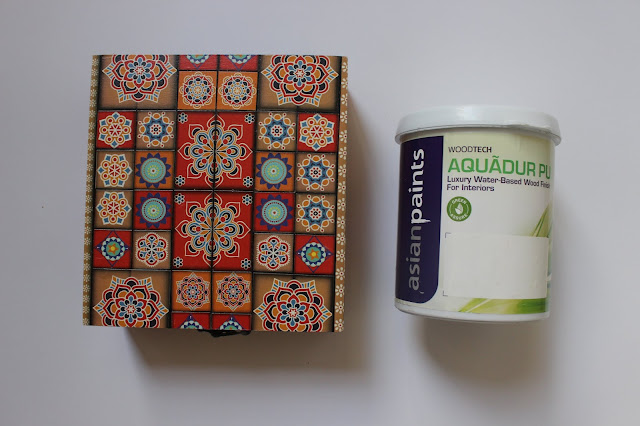
Multi-keep Mosaic Decoupage Box :
I am Manisha Gidia, one of the Design Team members of Nakshathra Designz. Today I am here to share My First DT post of How to make a Mosaic Decoupage Multi-keep Box from scratch.
Things Needed :
- MDF Box
- Nakshathra Designz Mosaic Love - 1 Decoupage Paper
- Gesso
- Flat Brush
- Paint
- Sponge
- Decoupage Glue
- Resin and Hardener
- Aquador PU varnish
- Sand Paper
- Plastic Cup
- IceCream Stick
- Tooth Pick
- Tissue

Let's look into the procedure of how we create this beautiful Multi keep Box.
Step 1:
Take a plain MDF Box and apply Gesso using a flat brush. After the gesso dries sand the box to give a smooth finish.
(Gesso is used to enhance the color applied to the base.)
Step 2 :
After the Gesso dries completely, apply black paint using a flat brush or sponge on the lid and the inside of the box.
Step 3 :
After the paint dries, we cut the decoupage paper according to the design and place them on the lid in the choice of our order.
Step 4 :
Once the design is set, we attach the papers on the lid slowly using the decoupage glue and press the paper to remove bubbles if any, and keep it aside to dry. Once the glue dries completely we can remove the excess paper hanging out of the box using a scissors.
Step 5 :
Before we start doing the mosaic effect using resin and hardener we have to seal the lid with two coats of water base varnish with proper intervals for each layer to dry completely. . (After doing the mosaic decoupage we will not be able to apply varnish in that area.)
Step 6 :
Now comes the most interesting part of this beautiful box. We mix small parts of resin and hardener in the proportion of 1 : 1/2 and mix slowly for 2-3 minutes using an ice cream stick until we get a clear solution. Do not worry about the bubbles being formed as they will disappear after pouring.
(The mixing proportion of resin and hardener will vary with each brand. It will be mentioned on the bottle.)
After getting the clear solution, we pour a small part of on one square with the help of an ice cream stick and spread it to fit within the square using the head of the toothpick. Similarly we follow the same thing for each cut part.
NOTE : Do not use the same cup and stick for mixing the resin and hardener again. Always wear gloves while working with resin. Keep a tissue beside to wipe immediately in case of any spill.
Once all the parts are covered with resin, leave the box untouched for 32 hours for the resin to dry completely.
Step 7 :
After the resin has dried for 32 hours, we can decoupage the sides of the box using the other paper from the Mosaic Love - 1 Set. After the glue dries completely we can cut the excess using a scissors or sand off the edges using a sand paper. And apply two coats of the water base varnish on the paper and the inside of the box.
The Mosaic Decoupage Multi-keep Box is ready.
.
These are the simple steps that can help you also create a beautiful Multi keep box to enhance the bright corner in your room/cupboard.
Hoping to have kept the steps as simple as possible. Hope you all liked the post and if you did, do drop your love in the comments section. 💗
With Lots of Love
Product used from Nakshathra Designz :
You can buy the papers from any of the following links :
2. Avni Vyas - Craft Destination Centre
4.www.craftjunction.in[palak karthikey patel]
5.www.amazon.in
Thank You 😇


Loved it and very well explained in detail. Keep up the good work mani :)
ReplyDeleteThank you so much di :)
ReplyDelete