Showing posts with label colourful birthday. Show all posts

Tuesday, 9 May 2017

Shabby Chic Tags-Guest DT post by Riddhi Jani

Hello guys,
Hope you all are doing well,
We at Nakshathra Designz are happy to introduce our Guest Designer Riddhi Jani.
Over to her:


I'm so happy to share with you my first GDT project for nakshathra designz .
First of all I would love to share about myself. It's Riddhi from mumbai. I am a mother of a little one who's just 19 months.and I can't stay without craft. I do it almost from the childhood but took as a career from 2015.

I must say this is simply gorgeous papers. And it was really fun making ❤️


Let's go the project !

So I have made a pair of shabbychic tags
Here it comes....
I have used "colourful birthday " & "dazzling queen". I'm in love with this gorgeous papers.


Hope you all loved my tags.Feedbacks are welcome.Stay tuned for more projects.

You can buy all Nakshathra Designz projects from www.craftsneed.com


Friday, 10 March 2017

Double Diamond Fold Card tutorial - DT post by Monica Koneru

Hi everyone ...
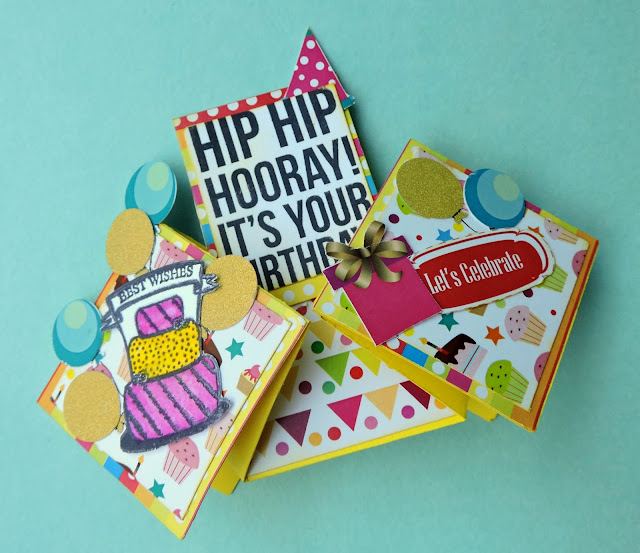
Mounika here today I am going to share tutorial of double diamond fold card
Using. Happy birthday pack from nakshathra designz....

The double diamond fold card is a little tricky because of the way the two ends fold.  I would suggest starting with a piece of printer paper so you get the hang of the creases and the direction of the folds, and don't be discouraged if it takes several attempts to manipulate those ends!
Template....

1.  Cut a piece of card stock to measure 11x 5".  Score all the lines using the template above as a guide for measurements.  You may find it easier to draw in the diagonal lines using a ruler and pencil.


2.Crease all the score lines
               

3.To crease the diagonal lines, fold the cardstock longways as shown in the picture below.  With both halves together gently fold the cardstock along the score line.  Flip and fold the other way, then repeat with the other end.


4.  Starting from the left hand side, mountain fold, valley fold, valley fold, mountain fold.  The two diagonal folds on either end of the card take quite a bit of manipulating to get them to sit correctly.  Note that the two diamonds will cross over at the front and back.
               
5.now it's time to decorate   cutted down 2.5"  pattern papers layer them with 2" panels finally embellished with diecuts from the same pack ..
Some close ups


Hope you enjoyed it ......


Wednesday, 22 February 2017

A pop up Shaker card-DT post by Rashmi Tater

Hello crafty peeps !

Birthdays are super fun and so should be the cards we make for birthdays ,right ?

I have a cousins birthday coming up so decided to make her a card which will suprise her and here goes the list
I decided on a shaker ( I'm in a shaker elements fever now 😜)
With a pop up function and will be adding her pictures later , I also added tags for the write up (yeah )
And a magnetic closure

So here is what I made "fun birthday card " (indeed )

I have used the colourful birthday pack which is perfect for the occasion and has fussy cutting elements too ! Used it to the full extentπŸ’•
A must grab if u have anything related to birthdays or brightness in mind

For the closure I did a magnetic one and added a handmade resin to it

Also added few flowers ( God can I do any project without flowers πŸ˜‹)


So I'm leaving u all here to enjoy the pictures ( I'm waiting for ur comments below 😊😊).

Thanks for dropping by .
Love
Rashmi

You can get these papers from 


Tuesday, 24 January 2017

Shaker envelopes along with pictorial-Dt post by Rashmi Tater

Hey guys !

It's been a long day ! And after a tiring day all u need is a cup of coffee and ur crafty tools to release the tension and relax u . So I ended my creating few quick envelopes and made them fun shakers to light up my mood !

And trust me these R delight to make and gift too !
Everyone will love these for Sure and I have a tutorial for u too ! Yeah !

I have used my bigshot , dies , and Nakshathra papers , distress inks etc
In Love pack and  Colorful birthday pack !


So we begin :
Just follow the pictures they have guidelines in them 😊


I also created a birthday themed envelope too .
Hope u enjoyed the tutorial and do let me know how u like it . Awaiting ur comments


Love Rashmi

Saturday, 21 January 2017

Altered Shadow box-Guest Dt post by Miti Bhavsar

Hello everyone,


My name is Miti bhavsar .By profession i m interior designer but i can't live without crafting .Crafting becomes one of the most beautiful part of my daily routine & as well in my life..

You can view my creation on my page :https://www.facebook.com/craftingworld2015/

You can follow my blog as well :https://craftingworld2015.blogspot.in/

So here is my first guest dt project for this opportunity i m really thankful to Akshma.
I altered chocolate box into shadow box..

I used Colourful BIRTHDAY paper pack.It has amazing & bright colour paper which can turn any project into best project.Use this paper once you will gonna love it for sure..

So here is pics so have a look...


Some Closeups:


You can grab this pattern papers from 

Colorful Birthday pattern paper can be bought from:
www.thecraftshop.com


Tuesday, 20 December 2016

Super cute DIY embellishments- DT post by Kriti

Namaste Friends!
Hope you all are doing well.
You all need something to take your work to the next level. Embellishments come to the rescue.
As you all know that I love making mini albums....and because of that...I left with many scrap papers from beautiful scrapbook papers by Nakshathra Designz.
So this time I thought to utilize them....so I made some embellishments out of that by using some basic dies....circle, scallop circle, square and stitched rectangle dies.
Have a look....isn't these are cute!!!


Use your dies, punches or fussy cut some circles, scallop circles some squares and arranged them in the way you like. I have used some buttons also. This is how these cuties were born! Easy peasy!

Closer look...


Oh, they’re so pretty!

Be creative! Use different patterned papers to create this. Mix it up! I loved making these using just some cute papers and buttons.
Well, I hope this inspires you to pull out your patterned papers and cut them up to use for embellishments! It’s a great way to use up your stash!

Thanks for stopping by!!
Kriti

You can buy Nakshathra Designz paper from
http://craftsneed.com/nakshathra-designz-2
http://craftsneed.com/nakhshathra-designz